Friday, February 3, 2017

How to Earn $25-$295 Daily with Affiliate Marketing for beginners 2017
How will you be feeling when going to bed at late night knowing that you've earned $25 to $295 per day from Affiliate Marketing?
how-to-earn-money-with-affiliate-marketing-beginners
Many beginners and some senior bloggers who are new in the field of making money from their blogs and websites are wondering if you can really earn from Affiliate marketing programs.

Once you enter in Google's suggested searches you will find a lot of such beginners' contradicting questions that are being searched. See some of those Queries.
  • Can you make money with affiliate marketing for beginners
  • Can you really make money with affiliate marketing
  • How fast can you make money with affiliate marketing
  • Start affiliate marketing with no money
  • How to Easily Earn $50-$100 Daily with Affiliate Marketing?
  • How to Earn $25-$295 Daily with Affiliate Marketing for beginners
  • how to do affiliate marketing step by step
  • how to do affiliate marketing with amazon
  • how to make money with affiliate marketing without a website
I know many people out there  are still wondering if one can really make a handsome amount of money online with affiliate marketing program. 

If you are one of them then don't worry,cause i think you have landed on the right place. Stay in touch to my tips and step by step guide of earning $100 per day from Amazon, Clickbank or whatever the marketing program you;ll be interested in.

Step by step Guide on how earn money with Affiliate Marketing.

People are always selfish, and you know that! So are Tech Gurus too..

On The last month, i come up with an idea of doing a little investment from the simple plan that took me just 3 days to set it up. 

The plan was all about spending a penny of dollars and earn a bunch of money from it.

How are we going to generate money fast and easily with low investment?.

Out of these tips and tricks i'm going to share to you, as an affiliate marketer you should have the basic skills of monetizing your blog's traffic, the skills of writing good English will help to make your way a bit smoother. 

But one thing that you should not let it be below 50% is "Your Patience!" 

Also i should make one thing clear before diving to the whole Guide. Smart work is every thing!, whatever you do, if you do it carefully and right. then expect to get the most out of it. I'm telling you this to assure that, you can generate even $1000+ per day or $0 a day depending on your smartness. 

What do i really need to make money with Affiliate program?

Below are the most important things required to accomplish our mission of making Dollars from Affiliate programs. 
Those things are 
  • Blog or Website
  • Basic knowledge of HTML and CSS
  • Writing Skills
  • An eBook ( short notes )
  • Email marketing + Autoresponder
  • Targeted Traffic
The above are the only things we gonna need to make your wallet full of money. 

So, as our journey proceed, it is never a good thing to leave our mates behind, the beginners. Let me take a time to go through each of the above things so that we could all be on the track. 

A Blog or Website. 

This is one of the most important part in our mission. Pro bloggers are aware of this and if you are one of them, you can just skip this point and go to the next one. 

Let me Give you some basic needs of the blog | website which we going to use it with affiliate marketing to make money.  

Here, you will need to have a blog which generate organic traffic of about 200 unique visitors per day. 

If you don't have a blog or website, then its time to create one.
First of all you have to choose the niche which you are interested in. The one which you'll be able to write best reviews of its products. Choose the best name and then Create a blog.
You can create a blog from this free platform, Blogger or from WordPress.

Important Note! 
Choose Niche [ something ] that you are familiar with.  

Write about 15 SEO friendly articles by implementing the use long tail keywords on your blog posts. 

Doing so, you'll be able to generate a good traffic by your own, because it isn't much harder.

Basic HTML and CSS knowledge

The basics of Hypertext makeup language and custom style sheet are one of the important things which will help us to make our road clean to the destination of making $50 to $100 or above from this affiliate marketing guide. 

The HTML is the language used to create the webpage and CSS stylize the webpage created by HTML. 

One may wonder why are these HTML and CSS basics important?
Well, we need this basic knowledge so as to be able to customize the design of the website or blog we've created earlier by adding some special effects.  

We do all these to make the catchy design of the webpage, attractive and memorable to the eyes of your visitors. This is done so in order to make your visitors to stay a little longer and be in demand of doing something just in order to stay into your blog cause if its attractiveness.

This will also help to make visitors to visit as many pages as possible due to the design you've made. 
[ This is what's called engagement ]

Email marketing + Autoresponder

A service that sends an email automatically when someone subscribe to your blog is what's called an email autoresponder.

Example: if you want to send a specified list of emails to every new subscriber for first 7 days of his subscription, autoresponder can do it for you. 
We need this service because email marketing will be one of the great part of getting traffic and targeted visitors to the service you provide.

Common email marketing service providers are 

For beginners 
I strongly recommend to use Mad Mimi email marketing. 
This service is very easy to use and it is very cheap compared to other email marketing service providers. I surely hope their support won’t disappoint you.

why I strongly recommend MadMimi?

  • Very easy to use
  • Awesome interface
  • Affordable Price and servies
  • FREE upto 2.5k Subscribers
  • Very cheap as compared to Aweber or MailChimp

You may SIGNUP FOR MADMIMI NOW 

Note: The 100% working method to earn money with affiliate marketing is here. It is so simple and easy to creative minds and it gives fast & guaranteed results upon your hard work.

Have A Unique eBook
In order to get your expected income, you have to set up all your steps in the right way. Now, This step of making an eBook is the Core point of this earning scheme.

Its time to sit down and note all the important things to be included in your eBook. 

Write an eBook that will make your readers to be interested in reading your book again and again. Make them inspired on doing something scary, or let them see the hardest task on their field in a different way.

All you have to do is to do whatever you can to win your readers' attention and trust. Make them trust you by using your writing skills But Never write a Lie. 

Try to dig deep information about what you are going to write about before starting your work. This will help you to have enough references of current data and findings.

Offer the readers some affiliate links in your eBook. 
Let's see how this can be done.

Follow these 
9 Powerful Tips for Writing Your First Successful Ebook
 And
Revealed tips from 14 Authors on How To Write Ebooks That Sell

Write an eBook with great information about your niche, which audience all over world wants for FREE.

For doing this, create a very catchy cover and make the title of eBook a bit spicy.

If you can’t write an eBook then you can outsource it from others too. They are many writers available there. It may be a bit expensive. So better you write by your own.

Landing page

After creating eBook, it’s time to create a landing page for your blog. A landing page is where your visitors lands, and that page attracts the visitor and makes them give their email/buy the ebook/subscribe to your blog etc.

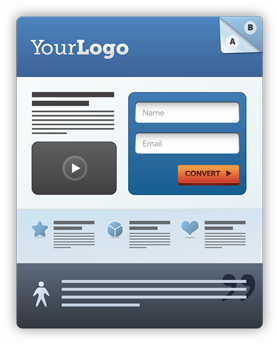
Different landing pages have different proposes to convert. For this process, you need that visitor to provide you his genuine email address. In return you’ll give the report/eBook to him for free.

Create a landing page on your blog’s homepage because most of the visitors land to your homepage. If you don’t know to design landing pages, then here are few helpful links where you can learn to do it. Helpful links: (link 1)(link 2)(Link 3)(Link 4).
Once you check out all the above 4 helpful links, you’d get enough information about landing pages. So lets move on.

After that, you’ve to setup an autoresponder. When someone gives his/her email address, the autoresponder will send him a notification to confirm it and the eBook (for what he subscribed).

Once you have built all this things, you’ll need traffic to your landing page. 
How?
Put the link of your landing page on your website to help to get your readers subscribed. 

The best ways for getting traffic to your blog and landing page are:- 

  • Organic traffic from Search engine
  • Guest posts on blogs on your niche
  • In author bio
  • Advertisements ( Facebook ads )
  • Adwords
  • Content marketing and so on...

Once you get the email address, now its time to convert them into buyers.

Practical Testing for your Niche / email list

Send them a 7 day course which will teach you something unique in your niche.

For example, if you are blogging about weight loss, send a 7 day course named “The 7-day Plan to lose weight guaranteed”

If your blog is about blogging tips, then send them “How to Make Your Blog More Profitable in 7-days”

The more attractive your headline is, the more attention you will get. :D

In this 7-day course, you need to win the heart of him/her. You need to build relation of trust with them.

So be careful while writing it, it is very very important.

Once you are done writing it, now it’s time to earn some money. You gave them lots of information for free, now its your turn to start selling the information to them.

You will help them make the process fast while earning some money.

Like when you sent a course titled “The 7-day Plan to lose weight guaranteed” promote some products related to losing weight and earn money. When they will trust you, they’ll surely buy it. For finding products related to your niche, you need to sign up at clickbank or amazon associates.

This two are best affiliate networks. I use clickbank most. Amazon associates is also good.

You will get a unique link named affiliate for the product from the affiliate networks. Include it in the email, when the person will buy it via that linked, you’ll earn commission for it.

The best thing is that, you can even get more than the creator of product gets for a sale. This is affiliate marketing.

This is the method which can generate you $25-$295 on a daily basis.

Always remember
The secret to generate more profit is getting more traffic and more emails.
AND
Call to Action is made much higher by trying to impress your visitors. Gaining your visitor's trust is one of the thing which is much more important than just flooding your webpages with Affiliate links. Good Luck Guys! 
Let me hear something from you in Comments below. 
Don't forget to hit share buttons.

Thursday, September 1, 2016

[Solved] How Many Adsense Ad Units Are Allowed Per Page? 2017
Hello Buddy! There are many other bloggers out there who do not have a great conclusion on the number Adsense ads to display per single page. So, It's not only You.

But wait!


What would be your answer if you was the one to get asked this question by your reader? 

In 2016 my earnings down. I have 2 entertainment niche blogs, but now i close one of my blog because I think it's a low quality site. 
How many Google Adsense ads per page should i put on my blog? assist and give me handful information, help me please sir. Thank you!

Can you answer me the question right now? 

If Yes then you are lucky but if you are getting stuck on answering it then keep in touch. At the end of this post you'll know exactly what is the best number of ads to put on your blog
maximum-adsense-ads-per-page
Currently, many people has been confusing and getting wrong the idea of Maximum number of Adsense unit to be placed per single blogger page by putting up to five ads and expecting to get high cost per click. Believe me or not, They are totally wrong! 

Number of Ads permitted to display per Page

There is a limited number of Adsense allowed to be displayed on a screen. So, as a publisher you should know what Google Adsense policies limits the number of its Advertisement per single web page.
The maximum number of Ads served by Google Adsense to be displayed on your site without putting it into the risk of being banned are:-
    • Not more than 3 content Ads unit
    • Maximum of 2 Adsense for search
    • Less than 3 Adsense link unit

Always remember this Adsense allows Maximum of 3 Ad Units per page!.

Publishers are allowed to use Less than 3 content Adsense unit and not more than three Link ads units. If you are using Adsense for search, you can put One of it andTwo of them if your site has such a demand.

One may think or ask about this question, 

What if i have very long post, Can't i use more than 3 Adsense Ads?

The answer is simply No! You aren't allowed to exceed the limit instead you can add 3 link units

Important Note not to forget.

No matter how long your post is, never serve more than 3 (ad units), yes, you'll be violating policy!  So don't try to put your adsense account into the risk of getting getting warning notice or banned. 

If you think your post are much longer and you need additional ads, feel free to try and apply to another advertisers because Adsense does not limit other networks as long as you are not violating their policies

Putting many number of Ads per page results to more loss than gain.  Yeah! That's right

My advice & recommendation to you
I recommend you to check the arrangement of your site first. Use three ad units If it has many layout and displays many content per page. If not then you better use two ad units

Also, the best Ad placement is after first paragraph. (if you are using Blogger you can place it below the post Tittle) and at the middle or end of the post.

Many bloggers don't like to use link ads but they are really good to try. They converts better. So, put one or two of them per page.

Note: Whatever the ads arrangement you put in your blog. Try not to exceed three display ads and three link ads per page so as to comply with [Google adsense policies].

Hope this advice will help you to get a better decision about your maximum number and better adsense placement.  
 

I would like to hear something from you!

Thursday, August 18, 2016

Samsung Galaxy Note 7 Reviews:Things you didn't know about
Pre-ordering, news and features you never knew about the best 2016's Samsung Phone with extremely larger curved screen of 5.7 inch, with an S Pen stylus, powered with a super efficient battery. That is Galaxy Note 7!

Samsung Galaxy Note 7 Release date

In the internet there have been many rumors about the release date of this Samsung's brand new Phone. But the real date which is set for the release of the Galaxy Note 7 in US is August 19. Also it's the the same as in Australia.

Three days after its release in IU.S.A and Australia, it will be launched in UK. That is September 2.

NOTE! Pre-orders In the UK was launch in August 16.

Samsung Galaxy Note 7 price

The price of the Galaxy Note 7 in the US is between $33 and $36.67 a month on device payment plans with AT&T, Verizon, T-Mobile or Sprint Carriers.

Without a contract, it's anywhere from $850 (T-Mobile and Sprint) to $880 (AT&T).

Sprint is the only one offering old two-year contracts in exchange for $350 upfront.

The Note 7 price in UK is £749. 
And in Australia is AU$1,349.

But if you Pre-order in certain stores, you'll receive a bonus: either a Samsung Gear Fit 2 fitness tracker or a Samsung 256 GB microSD card, your choice. Shop around.

The best advices of all the time from my co-worker

I think people need to distinguish phone for work and for entertainment. S7 is for entertainment, just like iPhone and many others. Note is for work. I am at lost now after upgrading to S7 from Note 3. 

Really. That pen, is my life, if you are a businessman. You need it to explain to your client, you need it to take note when you meet clients. You need it to sketch your design. 


You need it to draw component, you need it to draw your flowchart, you need it to illustrate your point. You need it to take moments of meeting. You need it to to tell your audience graphically.

Try to tell your customer which object connect easily with sentences. 7 symbols, and few lines between them will show their relationship, you have to write a full page for that diagram. 
samsung-galaxy-s7
So, I think you are really missing the point of having a note. Perhaps, one day when you have throw your tablet and laptop, you'll appreciate what note gives you. I do, since after I owned note 2, I only carry one thing in my pocket, and one thing only. Galaxy Note. It holds my rfid keys, my cards, my meeting moments, my drawings, my reminders, my business secrets, CCTV videos, my signed contract agreements, and many other thing. With this one device, I don't need any tablet nor notebook, not even agenda or scrap paper and definitely not a traditional pen.

The other person can also see things in this way.

As a rabid fan of the Note series, I'm stunningly disappointed in this release. Samsung has again crippled this phone, as they did with the Note 5. How so?

1) No removable battery is a *terrible* thing to do to a phone, saddling users with a battery that degrades from day 1 (even more so when using quick-charge technology) and no way to replace the battery without a huge bill. Plus, no matter how fast your fast charging tech is, it can't go from 0% to 100% in less than 30 seconds like the Note 4 can. 


If LG can find a way to keep removable batteries (and it's done it well with the G5, and with the almost-ready V20) then Samsung has NO excuse. When your battery dies and you're not lugging your charger & cord, and close to an outlet... enjoy your $1000 paperweight.

2) Removing the IR blaster for TV/Stereo/etc remote control is hugely aggravating. The Note 3 and 4 were excellent universal remote devices, and now we're back to 4 remotes sliding down the couch cushions next to the popcorn kernels. Great.

3) Removing the shatter-proof back of the phone, replacing with glass that often breaks when dropped. I swear if I hear one more wanna-be hipster saying "but muh premium materials!" I'll grab him by the man-bun. Seriously, tech journalists are *just* as guilty for making this an issue, when it simply is not. Hey newsflash: Your $1000 phone belongs in a case!! And now your fancy premium finish (which you just sacrificed several key features for) is moot. Happy now??

4) Only 4GB RAM. Seriously Samsung? Google is about to release the first ever version of Android which properly supports real multi-tasking (where RAM is key), and you give us the same tired 4 Gigs of RAM as last year's phone?? When it's proven possible to go 6 Gigs, because that's what you're releasing in CHINA??? Wow. Just wow.

5) Only 64GB onboard storage. Again, in 2016 this is a crime. Yes, you can add a 256GB microSD card (halleluyah, they un-crippled something!) but really, in a flagship phone, 64 is a minimum, not a maximum spec.

So there are 5 key areas that the Note 7 is seriously flawed, and very arguably a downgrade from the Note 4. But Techradar's review calls it the perfect phone... Seriously? LG's V20 flagship (removable battery, IR blaster, second screen, Quad DAC hi-fidelity audio, Android Nougat, etc etc) is shaping up to be a MUCH better phone, if you can live without the stylus. Save your money and wait for the V20.

Thursday, August 4, 2016

How To Login 2 Or Multiple FB Accounts At The Same Time-[Google Chrome]
Do you have more than 2 Facebook accounts and you want to login at the same time and same browser like Google Chrome?. Well, you are in the right place to learn it. 
There are so many methods you can use to Log in to multiple Facebook accounts accounts on your Android-Smartphone, Laptop, Tablet or whatever the device you are using BUT the Fb trick of running three or Ten or Hundred Facebook accounts in one device at once without logging out even a single of them is not popular or known at all. I'm gonna show you soon how to do it.
But, Lets go and see how to open 2 Facebook accounts in the same browser.
We are going to do this by switching to incognito window 

By switching into New incognito Window.  

Had you ever had an idea about Private window with in the browser you are using?

There is a private window which can let you Log in to your Facebook account Just as you have previously logged into the First FB account using that browser. 

Also the incognito window is used without saving your history.  Does it sound alright?
With incognito window.. all your log-in's and the history will never be saved so once you cancel the Tab you'll probably not be ready to get back to the previous pages unless you Log in to your accounts again. 

Recommended: How to track Facebook profile visitors 2016( Fb viewers trick)

One more thing you should be aware of incognito windows is that, your secret will be safe with it! wondering why? Ummh... simply because no one will see your browsing history.

Open 2 Facebook accounts in Google chrome browser - incognito window

Go to google chrome browser

  • At the Top right corner You'll see Three horizontal lines 
  • Click on them and you'll see a drop down menu with many options
  • Click on New incognito window option
  • The window with black background will come up with the white words telling that 
You’ve gone incognito

Pages you view in incognito tabs won’t stick around in your browser’s history, cookie store, or search history after you’ve closed all of your incognito tabs. Any files you download or bookmarks you create will be kept.
However, you aren’t invisible. Going incognito doesn’t hide your browsing from your employer, your internet service provider, or the websites you visiLEARN MORE
  • Now you can search for Facebook and proceed with the log-in by entering your Email/phone number and password.
  • Then login to your second Facebook account  
This is how to log in into multiple accounts using private/ incognito browser in Google Chrome.

Monday, July 25, 2016

[Latest] Micromax Mobile Secret codes and Hacks
You can get the most out of your Micromax mobile phone by having funny moments with the use of these Android secret codes

Hidden Android tricky codes listed below will help you to make some amazing funny hacks on your mobile that you never thought your device could do. To restore factory setting password is just a minor problem that could be solved like 2+3 = 5 as it will be explained below Plus the use of all the Micromax mobile reset code list.

Note: We Cannot guarantee that these codes will work on all micromax mobiles!


Did you Check This out?  "Android secret codes 2016 (Hidden tricks for hacking smartphone)"


Android base Micromax Mobile Codes list are:
(1) *#06# 

This code will show Emei Number


(2) *#110*01# 
Code for Entering into Engineering Mode

(3) *#987# 
Code for Entering into factory Mode

(4) *#987*99# 
Code for showing Restore Factory Settings

(5) *#900#  
Code for showing Check Software Version

(6) *#800# 
Code used to Check Software Version

(7) *#369# 
Code used to Change LCD Contrast

micromax-secret-codes

How to change screen language on Micromax?


If you have been asking How to change screen language on your Micromax-Android mobile phone. Then don't worry because we have the codes list which will help you to do it. Just choose the codes containing the language you want to change To and write them on your dial screen and Finally dial them! Simple as that.. 

(1) **#0000# + [Dial/send Button] 

used to Set Default Language


(2) **#0007# + [Dial/send Button] 

used to Set Language to Russian


(3) **#0033# + [Dial/send Button] 

used to Set Language to French


(4) **#0034# + [Dial/send Button] 

used to set Language to Spanish


(5) **#0039# + [Dial/send Button] 

used to set Language to Italian


(6) **#0044# + [Dial/send Button] 

used to Set Language to English


(7) **#0049# + [Dial/send Button] 

used to Set Language to German


(8) **#0066# + [Dial/send  Button] 

 used to Set Language to Thai


(9) **#0084# + [Dial/send Button] 

 used to Set Language to Vietnamese


(10) **#0966# + [Dial/send Button] 
used to Set Language to Arabic

Addition

Check some common Default User Codes here: 
1122, 3344, 1234, 5678
Also,
To Enable COM Port: *#110*01# -> Device -> Set UART -> PS Config -> UART1/115200

Note: We will not be responsible for any damage of your phone,we'll not will be liable for any damage.

Tuesday, July 12, 2016

Cheap Unlocked Smartphones Under $100 at Walmart - Best BLU's budget 2017
Top suggestions of the best BLU Phones under 100 USD

We have prepared our Top picks and suggestions of the best smartphones on this beginning of the third Quarter of the year 2017. We are going to see the Best and cheap prepaid and Unlocked Smartphones from Walmart, the best U.S smartphone suppliers and at Amazon.

Related: Top Best Cheap Smartphone in Walmart under $20 to buy 2017

Out of the Cheapest Smartphones sold under 20 Dollars on Walmart as we saw on our previous Article, Below are Other phones which can be bought by those with their budget under $100. These cell phones have super best specifications and good battery life w.r.t to their price. These 2017 best unlocked smartphone list aims to help you not to spend much from your budget so as not to exceed the limit that you planned to spend on buying a smart phone.

Cheap Unlocked BLU Smartphones at Walmart | amazon  
Have you ever heard about This US BLU Phone Maker?. I guess Most may say No but those who are good Sellers and Buyers of Unlocked Smartphone from United States will surely say YES! Well, From my experience, i have seen that BLU gives the best smartphone for the budget below 100 bucks among other phone manufactures who sells their handsets starting at extremely low price. Let's go and see these BLU Phone's models below 

2. BLU Studio Selfie S070Q - Gold 


Blu-studio-selfie-s070q
Price:  $79.00 at Walmart or $74.87 at Amazon 


This BLU studio Selfie is Unlocked Smartphone which offers good performance on its 5 megapixels front and real Cameras. It has a Flash light which ensures you full possibility of taking photos even an night or dark places without fear of capturing buggy images to fill up your memory. It also has 8GB expandable Memory and some advanced features compared to other Prepaid and unlocked smartphones which are found at this price. Other colors available for this Model are Grey and White 

BLU Studio Selfie S070q Specs

    • microSD card slot
    • With 2G: GSM 850/900/1800/1900, 3G/HSPA+: 850/1700/1900/2100
    • WiFi 802.11 b/g/n, hotspot
    • Bluetooth: v2.1, A2DP, EDR
    • Internal Memory: 8GB, 1GB RAM, microSD slot expandable up to 64GB
    • USB: microUSB v2.0
    • GPS: with A-GPS
    • Android v5.0.2 (Lollipop)
    • Five-megapixel camera (2592 x 1944 pixels) with LED flash and front-facing 5-megapixel camera
    • Powered by a 1.3GHz Quad-core Mediatek MT6580 processor
    • Browser: HTML
    • Long-lasting 2000mAh battery
    • Vivid 5.0" IPS LCD capacitive multi-touchscreen
    • Onscreen keyboard
    • Touch navigation
    • SMS (threaded view)
    • MMS
    • Email
    • Push Email
    • IM
    • Phone
    • Battery
    • Wall charger
    • USB data cable
    • Headset
    • Silicone case
    • Screen protector
    • User guide

1. BLU Studio C5+5 D890u


BLU-Studio-C-5+5-Unlocked-Android -Smartphone
Price:  $74.87 - $79.99 at Walmart or $74.87 at Amazon 

This Unlocked Android powered BLU Smartphone. The Studio C5+5 runs Android 5.0 Lollipop Operating System  

It has 8GB internal memory | 5MP camera | Micro SD slot
4G LTE Capabilities

The BLU Phones Can be used with cricket Carrier

Compatible with Tracfone, Straigh talk 4G network,
D890u GSM Dual-SIM

All Blu phones come factory unlocked so they work with Verizon as well.

Below are Overall Specifications of the Unlocked D890u BLU Studio Phone  

    • MicroSD slot
    • 2G: GSM 850/900/1800/1900, 3G: HSDPA 850/1700/1900
    • Bluetooth v.4.0
    • MicroUSB 2.0 port
    • WLAN: 802.11 b/g/n
    • Android 5.0 (Lollipop) OS
    • 5-megapixel camera with LED flash ( front-facing )
    • BLU Studio smartphone, (unlocked) is video capable
    • Quad-core Cortex-A7 1.3GHz processor
    • Browser: HTML5
    • 8GB internal memory
    • 1GB RAM
    • GPS with A-GPS
    • Battery: lithium-ion 2000mAh offers the average Standby time of Up to 750 h
    • and Talk time of up to 10 h
    • 5" IPS LCD touchscreen
    • Onscreen keyboard
    • Touch navigation
    • It sends SMS, Email, push mail and MMS
    • Instant messaging
    • Wall charger
    • microUSB cable
    • In-ear headphones
    • Screen protector
    • Silicone case
    • Available in 7 different colors which are gold, blue, pink, orange, green, white and black

I suppose for $50 one shouldn't expect much, and not much is exactly what one does get. But anyone on an extremely tight budget (and the right carrier) It's a good bargain.Enjoy the savings!

I've prepared a Roundup review from one of the Blue phone user below.

I got the Blu Energy X Plus in November. 5.5" screen with a big battery for $112 (it was on sale but was regularly only around $129, I think). I use it on Straight Talk which uses Verizon and AT&T towers, depending on your phone. My biggest gripe is that Blu doesn't work with Verizon which are my preferred towers in my area.

It's a very pretty phone compared to the other cheapies. A nice display but I have noticed a bit of streaking once in a great while recently, but only with certain odd images (perhaps lots of white). Just replace the launcher with something from the Play store and you'll probably be happier with the interface. I've used Google Now and Nova. Both are better than what the phone comes with and they're free.

Mine has dual SIM slots but I only use one. It takes a micro SD card (mine has a 64GB).

I really don't worry too much about Android updates because no company ever seems to update their lower phones. Just buy a new model which will have a faster processor, etc, whenever you really really want the update. I can't say I've ever run into an app that wouldn't run on any out of date Android I've ever had.

People seem impressed when they see mine and are surprised at the price.

Yes, the camera could be better. Once every couple of weeks it will do a random reboot shortly after turning it on. I really can't complain too much. Whenever I decide to swap phones, I suspect it'll be another Blu. It's not perfect but I'm not going to pay $500 or more for a supposedly more reliable phone

Sunday, July 10, 2016

Best Solar Powered Outdoor Lights 2016 + Battery and LED Tips
Where to start? I guess the basics of Solar panels, Battery and LED's Lumens are the ones to start with in our guide to the best solar lighting on 2016.
best-solar-powered-lights

Solar panels:

There are three distinct types. 
  1. Monocrystaline, 
  2. polycrystalline and 
  3. amorphous. 
Mono is considered the best overall performer, followed by polycrystalline. Amorphous are the ones used in calculators and the cheapest solar products.

Polycrystalline are somewhat easy to spot because there appear to be "flakes" on the surface of the solar cells. Monocrystalline are what you'll find in higher priced pieces that look to have a smooth even appearance. All of these types can come laminated with a glass cover, but most amorphous are not. They are sealed over the top with glue and will become yellowed in time.

Batteries

The cheapest and least environmentally friendly are the nickel cadmium (NiCad) batteries. These are environmentally damaging in production and in disposal. They have a "memory" - meaning they must fully discharge to gain the longest useful life from them. They will last perhaps one season at best and do not have large storage capacity (maximum about 900mAh).

Next best are nickel metal hydride (NiMH) batteries. These batteries have little environmental consequence, though they, like all rechargeable batteries, should be recycled. They have no memory, so they do not need to be fully discharged to gain the most useful life. They have large storage capacities (upwards of 2600 mAh), and they have about twice the lifecycle of the NiCAD. Both NiCad and NiMH have shelf life drainage. Meaning, they will die out on the shelf.

Most solar lamp suppliers include instructions to charge the solar lamps for 48 hours before first use. That is because they may have NiCad or NiMH batteries that have drained completely while sitting on the shelf. It will take the NiMH batteries 5 ~ 10 charging cycles before they fully gain their potential.

Finally, the lithium battery. These LiFePO4 batteries are the king when it comes to performance. They pose little if any environmental threats, have huge storage capacities, no memory, have minimal shelf life drain, and last for up to 3 years.

Also read: 3 Best Solar Powered Lights - Buying Guide and Tips

Okay, so now about LEDs.

Just because an LED emits a blue hue does not mean it is a lesser quality LED. It only means the phosphors that are use are at the colder end of the kelvin scale (whiteness in LEDs is expressed in degrees K). The higher the degrees K, the whiter it will be. Warm white LEDs are within the 2700K ~ 3200K range. White begins at 4500K and becomes a bluish white at 5500K. The measure of light output is expressed in lumens. The base by which retailers express, for example, their "10X Brighter" statements is a measure against the 1.2 lumen bottom-of-the-line LED product. Spotlights with 50+ lumens are suitable for garden lighting, but wouldn't light up a tree or side of your house. For lumen output of 100+, you'll look to spend upwards of $100. 

As to LEDs, the bluer LEDs are not of lesser quality, they are just cheaper. Much more complex mixes of phosphors are required to get the warmer temperatures. 

So, when shopping for solar, remember good/better/best is going to be the combination of;
  1. Solar panels (Amorphous/Polycrystalline/Monocrystalline; 
  2. Batteries (NiCad/NiHM/LiFePO4); and 
  3. lumens (the higher the lumens, the brighter the solar lamp).
Here is a photo of a high quality solar post lantern sold at Home Depot. It employs a monocrystalline solar panel, lithium batteries, and is rated 135 Lumens.


A couple of things to remember about the current crop of solar lights is that they are made for mass-marketing. The key to this is "make them as cheap as possible". The performance of a solar cell is roughly defined by how much power a cell can produce for a given surface area, or in engineering terms it is how much of the sunlight energy gets converted to power (i.e, efficiency).

A manufacture will choose the cheapest cell type that meets the power requirements and still fits within the lights designed dimensions. Some of the Chinese manufacturers may use scrap cells from other solar cell productions (like broken pieces from larger cells that can be re-cut into useable product) that may be of a higher quality than others, allowing them to use a slightly smaller part. Either way, the lifespan of most any cell is measured in decades, far longer than the expected lifespan of the light. What this all boils down to is choosing the cell that has the best protection from the elements thereby ensuring the longest useful life, and not fretting over the underlying cell chemistry.

NiCads need to discharge fully to get maximum life (number of cycles)
 as stated above. This is exactly the environment of solar yard lights. Their temperature and overcharging tolerance, low cost, and general robustness make them ideal. Many NiCad lights I have dissected don't even use a charging regulator, the solar cell charges the battery directly. In these designs the cell is chosen such that its power output is below the level that could damage the NiCad by over charging. 

Alas the NiCad is not prized for being environmentally friendly. I have not seen any NiMH batteries in the lights I have dissected (Though I assume there are some out there!). My assumptions for this are as follows. 

NiMH batteries have more delicate charging requirements than NiCads. This requires the light manufacturer to install some form of charging control (at an added expense). The cost/charge cycle is about 3X higher for NiMH over NiCad (given proper maintenance such as operating temperature and full discharges for NiCads). Of course the manufacturer will consider this when deciding on a battery technology. You may disagree with me on the lifecycle count being higher for NiMH. All information I have puts NiCad at about 3x-5x longer life (again, with proper maintenance).

NiMH does have a superior energy density, that is where one AA cell NiMH will hold about the same amount of charge as two AA cell NiCads. If the manufacturer can recoup the higher costs of NiMH by reducing the size of their light, then NiMH would have an advantage. Of course the 'greenness' of NiMH versus the cadmium toxicity of NiCad may become an overriding factor. Lithium is indeed the 'king' for all of the above performance parameters, but the much higher cost and required charging circuitry will keep these out of the lowest end of the yard light market (i.e. the $1 WalMart specials).

As an aside, I bought several $10 solar floods and lo and behold, they use lithium batteries! Everything about these lights spells cheap. My guess for the choice of lithium is 
  • The greater energy storage needs to run a flood light overnight, 
  • The non-toxicity for marketing/environmental compliance.

Round Up

Final Verdict for shopping criteria with some the exception of the solar cell. Technology doesn't matter as the dominating consideration should be the protective layer over the cell. Simple coatings are the worst (will yellow/flake off), plastic covers will eventually cloud, glass will last years.

With more money spent, you will get the better technologies. Manufactures will make the light as cheap as possible while meeting the lighting requirements so you don't really have a choice except to pick what fits your needs.

Saturday, July 9, 2016

3 Best Solar Powered Lights - Buying Guide and Tips
best-solar-lights-buying-guide
Whether you are going to use the Outdoor lights for Gardening and security purposes or indoor, Quality is an issue that real matters for Solar lights. There are three important factors for the light itself (housing aesthetics and material aside) as we are going to check them below:-

Read: Best Outdoor Lighting Ideas for your smart home

1. Quality of the solar cell.

There is not much variance here. All solar cells used by these lights produce roughly the same power for the same surface area. The difference is in the coatings. Cheap lights use plastics or other coatings that will yellow or cloud up over time. Better cells are covered with glass (and there are different kinds of glass that are better/worse). Best bet is to look for a glass covered cell and maintain it by keeping it clean. 
best-solar-powered-lights-buying-guide-tips
Cell area determines how much power is delivered to the battery. A larger cell is needed for a full charge in dimly sunlit areas or places where the daylight is of short duration (shadows). Unfortunately all the lights I have seen are built to basically get a full battery charge given a full 8 or more hours of sunlight. The full charge is designed to give 6-8 hours of light from the LED after dark. The tinkerer types can combine the parts from two lights to either provide longer run time at night or get a full charge with a shorter daylight cycle.

2. Batteries.

Nickel Cadmium batteries (NiCd or 'NiCad')

The standard lights these days all use Nickel Cadmium (NiCd or 'NiCad') batteries. NiCads are generally cheap, reliable, and will give the longest service life compared to other battery types. NiCads however will all fail after a year or two since the number of cycles they can take (charged to discharged) is limited to a few hundred given the environment they operate in.

Temperature range

NiCads also have the best temperature range and are the technology best suited for outdoor use.Most batteries can be easily replaced but watch out for 'oddball' battery sizes in the smaller lights. Also be aware that often the cost of new batteries is higher than the cost of the original light. 

Avoid mixing battery types. 

You cannot just replace NiCads with Nickel Metal Hydride (NiMH) batteries since the charging requirements are different. Most of these cheaper lights have really simple charging circuits and will just not work with other battery types.

 Keep the battery contacts clean! 

The cheapest lights have poor sealing for the batteries and the contacts often get gummed up or corroded. This is a common cause of the lights losing their 'run time' or failing all together rather than dying a slow, graceful death due to the battery wearing out. 

3. LEDs (Light Emitting Diodes)

Bright, power efficient LEDs are what made these lights possible. There is a careful balance between the size of the solar cell, battery, and LED. The cell must generate enough energy to charge the battery, the battery must store this energy, and the LED must use up this energy at a low enough rate to shine through the night. 

Also read: Cheap Outdoor solar powered lighting for your Smart home

Better lights use better quality LEDs. A 'better quality' LED with be more power efficient, have a better light quality (this is the color rendering index or CRI), and be better focused. If you notice, the cheapest lights will have a harsh, bluish light. that seems to come from a single point. These are the cheapest LEDs to use. Better lights will have a 'warmer' glow and provide a more diffuse light pattern.

Useful Additional Hints 

This Precious information from My friends is worth to share with you! Let's Go..

I have used solar powered fairy (string) LED lights over the years and I have found that they work pretty well even when they aren't very expensive - however I have lost a set to frost when left outside (electronics don't like that much it seems!) and a se to foxes chewing through the wires. In London they would work all year round (and that is not a sunny place) except for the two weeks around Christmas / the winter solstice - which always sent my solar powered Christmas tree light plans awry. My solution is to have Christmas in the Southern Hemisphere whenever possible - where it's nice and sunny and warm!

Seriously though, if you research well and treat them well they tend to be a good bet. Just think about what you are buying, what it's tolerances are, where you are using them and what you want them for. The brighter you want them the more energy they'll need - so factor that in. For the most part however you don't need a LOT of light outdoors at night for most things.

Tuesday, July 5, 2016

How to track Facebook profile visitors 2016( Fb viewers trick)
what trick is used to track profile viewer who are in my fb friend list?.
Lets make the day of today to be amazing by getting to know One among the most applicable Facebook tricks in 2017. This trick is all about Tracking Facebook profile visitors.


Let's clear this question that many people out there asks themselves without getting proper solutions on how to do it. For some past years, I tried hard to get the proper solution for this question but i ended up downloading a bunch of Apps which didn't satisfied me at all because most of them didn't work properly. I guess u had ever come across some of those Applications. Well, Let's not take up much of our time and go directly to the answer on "how can i track my Facebook profile viewers"
how-to-track-facebook-profile-viewers
Officially, Facebook haven't released the official method on how to track these people who view your profile, So the method above is just a tricky way on how to solve and answer the question which is asked by very many Facebook users.

You never Know who is interested in your profile. It might be your Lover, Family member, Close Friend Or your Ex.. or sometimes it may be Those haters who are planning to Hack your Account by using Brute Forces (So their interest of getting access to your Account will be achieved by having your basic information like Birth date, hobbies, FB friends list and relatives). 

At the end of this lesson you'll be good enough at using this Fb trick by being able to know "who visited your fb profile the most" without downloading any App.

Steps on how to track Facebook profile visitors

Step 1: Log in to your Facebook Account
Step 2: Click on home to be at default/home page
Step 3: Press CTRL+U to open Facebook source code in a new window ( you can also do it by Right Click >> Open Source Code)
Step 4: press CTRL+F to open search Tab.
Step 5: Search for this line of "InitialChatFriendsList" you will see many numbers below the search query, now those are what we call Facebook user ID.
You can also see them on the image below
track-facebook-profile-viewers-source-code
Step 6: Now you can pick up any Facebook profile ID and replace the word Paste-the-ID-here 
in the link below www.facebook.com/Paste-the-ID-here and paste the whole URL in the browser to see who was visiting your profile.

This FB trick is the latest one and it is 100% working!

If you come across any problem, feel free to ask through comments, I'll be there to help you as soon as i can.

Tuesday, June 28, 2016

Keyboard Shortcut keys for Windows 7 - Awesome Computer tips
We all know that, the inputs to the Computer system can be entered and controlled by using the mouse. Now, the art of keystroke combination by pressing multiple keys simultaneously can lead to a certain input to the computer. This is what we call Keyboard shortcuts.
keyboard-shortcut-keys-for-windows-7
Today we are going to see the list of the shortcuts employed on windows 7 Operating System. These short cuts works well on the latest released Window 7 ultimate and even to other older windows versions like Windows 7 enterprise, professional, Home premium, home basic and the first released window 7(starter). 

The application of shortcuts keys is one of the best practice of using your PC like the Pro!. By knowing Different Operating system(like Windows XP and Vista) uses unique way of keystroke combination to operate the Computer is among of the thing which is gonna make thing easy on the application of this knowledge. That is, the computer shortcuts for windows 7 differs from those of Windows 8 as well as windows 10.

The function that can be controlled in windows 7 keyboard shortcuts can be categorized as:-
  • General windows 7 shortcuts
  • Ease of access shortcuts
  • Windows Explorer
  • Taskbar modifiers
  • Windows Gallery
  • Dialog box
  • Logging in/ log out
Also read: keyboard Shortcuts for App rearrangement on metro screen + Help viewer

Below is the list of shortcuts keys you should better try them out to use on your window 7 computer. Lets start with

General Windows 7 Shortcuts

  • Win + Up – Maximize the current Window
  • Win + Down – Restore down or minimize current Windows
  • Win + Leftdow – Dock the current Window to the left half of the screen
  • Win + Rightdow – Dock the current Window to the right half of the screen
  • Win + Number – Activate and run the program pinned on Windows 7 Taskbar, running program won’t be affected
  • Win + Home – Minimize all but the current Window
  • Win + Space – Makes all Windows transparent so you can see through to the desktop
  • Win + Pause or Break – Open System Properties
  • Win + Tab – Flip Aero 3D [press Tab to cycle between Windows]
  • Win + B – Move focus to notification tray (the right-most portion of the taskbar)
  • Win + D – Show/Hide desktop
  • Win + E – Windows Explorer is launched
  • Win + F – Search
  • Win + G – Bring all gadgets on top and foreground
  • Win + L – Lock Computer
  • Win + M – Minimize all Windows
  • Win + P – Open the projection menu (generally used for laptops connected to projectors)
  • Win + R – Run Command is launched.
  • Win + S – OneNote Screen Clipping Tool
  • Win + T – Show preview thumbnail of running applications in Windows Taskbar one by one without mouse over
  • Win + X – Mobility Center
  • Win + # – Quicklaunch
  • Win + = – Magnifier
  • Win + + or  – Enables the magnifier and zooms in/out
  • Win + Shift + Up – Maximize vertical size
  • Win + Shift + Down – Restore vertical size
  • Win + Shift + Leftdow – Jump to left monitor
  • Win + Shift + Right – Jump to right monitor
  • Win + Shift + M – Undo all Window minimization
  • Win + Shift + T – Cycles backwards
  • Win + Ctrl + F – Opens the Active Directory Find Computers dialog
  • Ctrl + Right – Move the cursor to the beginning of the next word
  • Ctrl + Left – Move the cursor to the beginning of the previous word
  • Ctrl + Up – Move the cursor to the beginning of the previous paragraph
  • Ctrl + Down – Move the cursor to the beginning of the next paragraph
  • Ctrl + Click – A pinned taskbar icon to cycle through the program’s open Windows (e.g. IE)
  • Ctrl + Win + Tab – Persistent flip 3D
  • Ctrl + Shift with an arrow key – Select a block of text
  • Ctrl + Arrow + Spacebar – Select multiple individual items in a Window or on the desktop
  • Ctrl + Shift + Esc – Open Task Manager directly
  • Ctrl + Shift + N – Create new folder

Shortcuts for Ease of Access

  • Right Shift for eight seconds – Turn Filter Keys on and off
  • Left Alt+left Shift+PRINTSCREEN (or PRTSCRN) – Turn High Contrast on or off
  • Left Alt+left Shift+NUMLOCK – Turn Mouse Keys on or off
  • Shift five times – Turn Sticky Keys on or off
  • NUMLOCK for five seconds – Open the Ease of Access Center
  • Win + U – Cycle through all open Windows

Windows Explorer

  • Alt + Leftdow – Go back
  • Alt + Right – Go forward
  • Alt + Up – Go up a directory
  • Alt + Enter – Open the Properties Window of the current selection
  • Alt + Spacebar – Open the shortcut menu for the active Window
  • Alt + F4 – Close the active Window
  • Alt + Tab – Switch to previous active Window
  • Alt + Esc – Cycle through all open Windows
  • Alt + D – Move focus to address bar
  • Alt + P – Show/hide the preview panel
  • Ctrl + N – Open a new Window
  • Ctrl + Mousewheel – Change the view type (extra large, small, list view, detail, etc.)
  • NUMLOCK + Asterisk (*) on numeric keypad – Display all subfolders under the selected folder
  • NUMLOCK + Plus Sign (+) on numeric keypad – Display the contents of the selected folder
  • NUMLOCK + Minus Sign (+) on numeric keypad – Collapse the selected folder

Taskbar Modifiers 

  • Shift + Click on icon – Open a new instance
  • Middle click on icon – Open a new instance
  • Ctrl + Shift + Click on icon – Open a new instance with Admin privileges

Dialog Box


  • Ctrl + Tab – Move forward through tabs
  • Ctrl + Shift + Tab – Move back through tabs
  • Shift + Tab – Move back through options
  • Tab – Move forward through options
  • Alt + underlined letter – Perform the command (or select the option) that goes with that letter
  • Enter – Replaces clicking the mouse for many selected commands
  • Spacebar – Select or clear the check box if the active option is a check box
  • Arrow Keys – Select a button if the active option is a group of option buttons
  • BackSpace – Open a folder one level up if a folder is selected in the Save As or Open dialog box

Photo Gallery

  • Ctrl + F – Open the Fix pane
  • Ctrl + P – Print the selected picture
  • Ctrl + I – Open or close the Details pane
  • Ctrl + . – Rotate the picture clockwise
  • Ctrl + , – Rotate the picture counter-clockwise
  • Ctrl + Mouse scroll wheel – Change the size of the picture thumbnail
  • Ctrl + B – Best fit
  • Ctrl + E – Search for an item
  • Alt + Leftdow – Go back
  • Alt + Right – Go forward
  • + – Zoom in or resize the picture thumbnail
  •  – Zoom out or resize the picture thumbnail
  • Shift + Delete – Permanently delete the selected item
  • Enter – View the selected picture at a larger size

Logging In/ Out

  • Win + Right + Enter – Shutdown
  • Win + Right + Right + R – Restart
  • Win + Right + Right + S – Sleep
Win + Right + Right + W – Switch users